Patios lend enormous value to your home, the whole of your landscape and create spaces for relaxation and entertainment.

Pavers and flagstone come in hundreds of different combinations of colors, styles, sizes, thicknesses, patterns, and textures. This enables nearly endless possibilities! Follow our guide to get you started in selecting your layout & materials and making your project unique. Check with our Gerten Experts and take a look at our Landscape Supplies. Stop by or give our Landscape Projects Desk a call at 651-239-1315
Step 1 - Area
Physically seeing the actual size of your canvas will help you visualize your project and can help make decisions easier.
- Mark off the area that you’ll be working with.
- Use landscape marking paint, landscape marking flags, measuring tape (best if on a reel), or even a garden hose.
- Take measurements and note permanent structures such as your house, the location of doors/windows, mature trees/landscaping, etc.
Step 2 - Style
Pavers can range from traditional styles to sleek minimalist, modern looks.
- Paving stones come in a variety of styles which include: Holland (brick), tile, cobble, weathered stone, old world cobble stone, slate, and even flagstone & cut stone.
- The appropriate style for your space will be determined by the type of house you have. For instance a Bungalow from the 30’s is a different style than a Victorian, Ranch, or Split-level type house.
Step 3 - Texture
Texture helps give your patio a visual character. Setting the tone for that space. Textures include:
- Non-tumbled (smooth)
- Tumbled (weathered)
- Embossed (contains dimples on the surface)
- Tumbled & embossed
- Slate
- Flagstone
- Hydropor or wet cast (very fine surface texture)
- Natural Stone offers a wide variety of textures not found in concrete or poured pavers
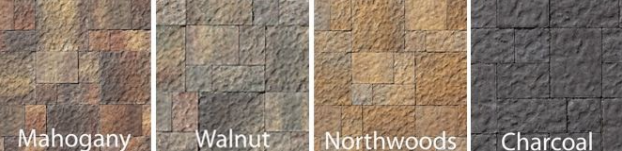
Step 4 - Color
- Complement your house by pulling in the roof and trim colors and incorporating them into your landscape, which provides a cohesive accent.
- The most universal colors and color combos are the neutrals & earth-tones such as: sandstone, cream/brown, tan/buff/brown, grey/charcoal, limestone, terracotta/cream/brown, and grey/tan/charcoal etc.
- A majority of pavers come in color ‘blends’ that combine anywhere from two to five different colors.
- To “make a statement” go with a dominant color that will draw immediate attention with a contrasting color palette and/or vibrant solids, such as reds and gold.
Step 5 - Patterns
There are many patterns to choose from depending upon the type of paving stones you choose, and your personal preference.
- Formal or casual.
- Pavers have nearly endless possibilities when taking into account different patterns.
- This is where you can get really creative.
- Keep in mind, the more original the pattern, the higher difficulty the project becomes.
The Gerten Experts are always available to answer your questions!
Step 6 - Pattern Angle and Inserts
There are commonly two different laying angles in which to lay pavers; a 90 degree angle or a 45 degree angle.
- The most common starting point is to take the angle off of the point of entry/exit of your home.
- Consider using both laying angles in the same project to delineate spaces.
- Insert a different laying pattern into the design to draw attention or accent to another area such as one laying pattern for the dining area and another in the cooking area/seating area/fire-pit or place etc.

Step 7 - Adding Borders
Depending on how large the area is, borders can add a significant accent to the project. There are many ways to lay the paver borders.
- Soldier - stones or blocks laid side by side or parallel for a consistent border.
- Sailor - edge pavers laid lengthwise in one or more rows.
- Stacked - using one size of paver lining corner to corner making a straight line.
- Running Bond - similar to stacked but at a half off-set.
- Random - challenging for the do-it-yourselfer.
Consider whether you would like to use one or multiple ‘bands’ depending on how wide an area you have and the amount of defined edge you want to create. You can use the same color or color blend as in your field for a subtle look, or a contrasting or accent color to make the border pop and stand out.
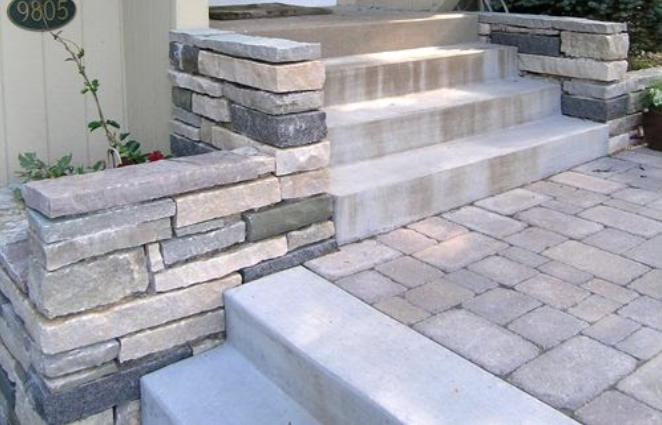
Step 8 - Accent Colors and Contrasting Textures
Changing the color and/or textures within a project can add a lot of depth and provide a nice finishing touch.
- Utilizing accent colors or different textures will delineate spaces that have different uses. For example the dining vs. cooking vs. lounging areas of your patio.
- Choose a separate border color or texture. If the majority of the colors in your patio are earth tones, consider accenting the borders with a solid color to frame the project.
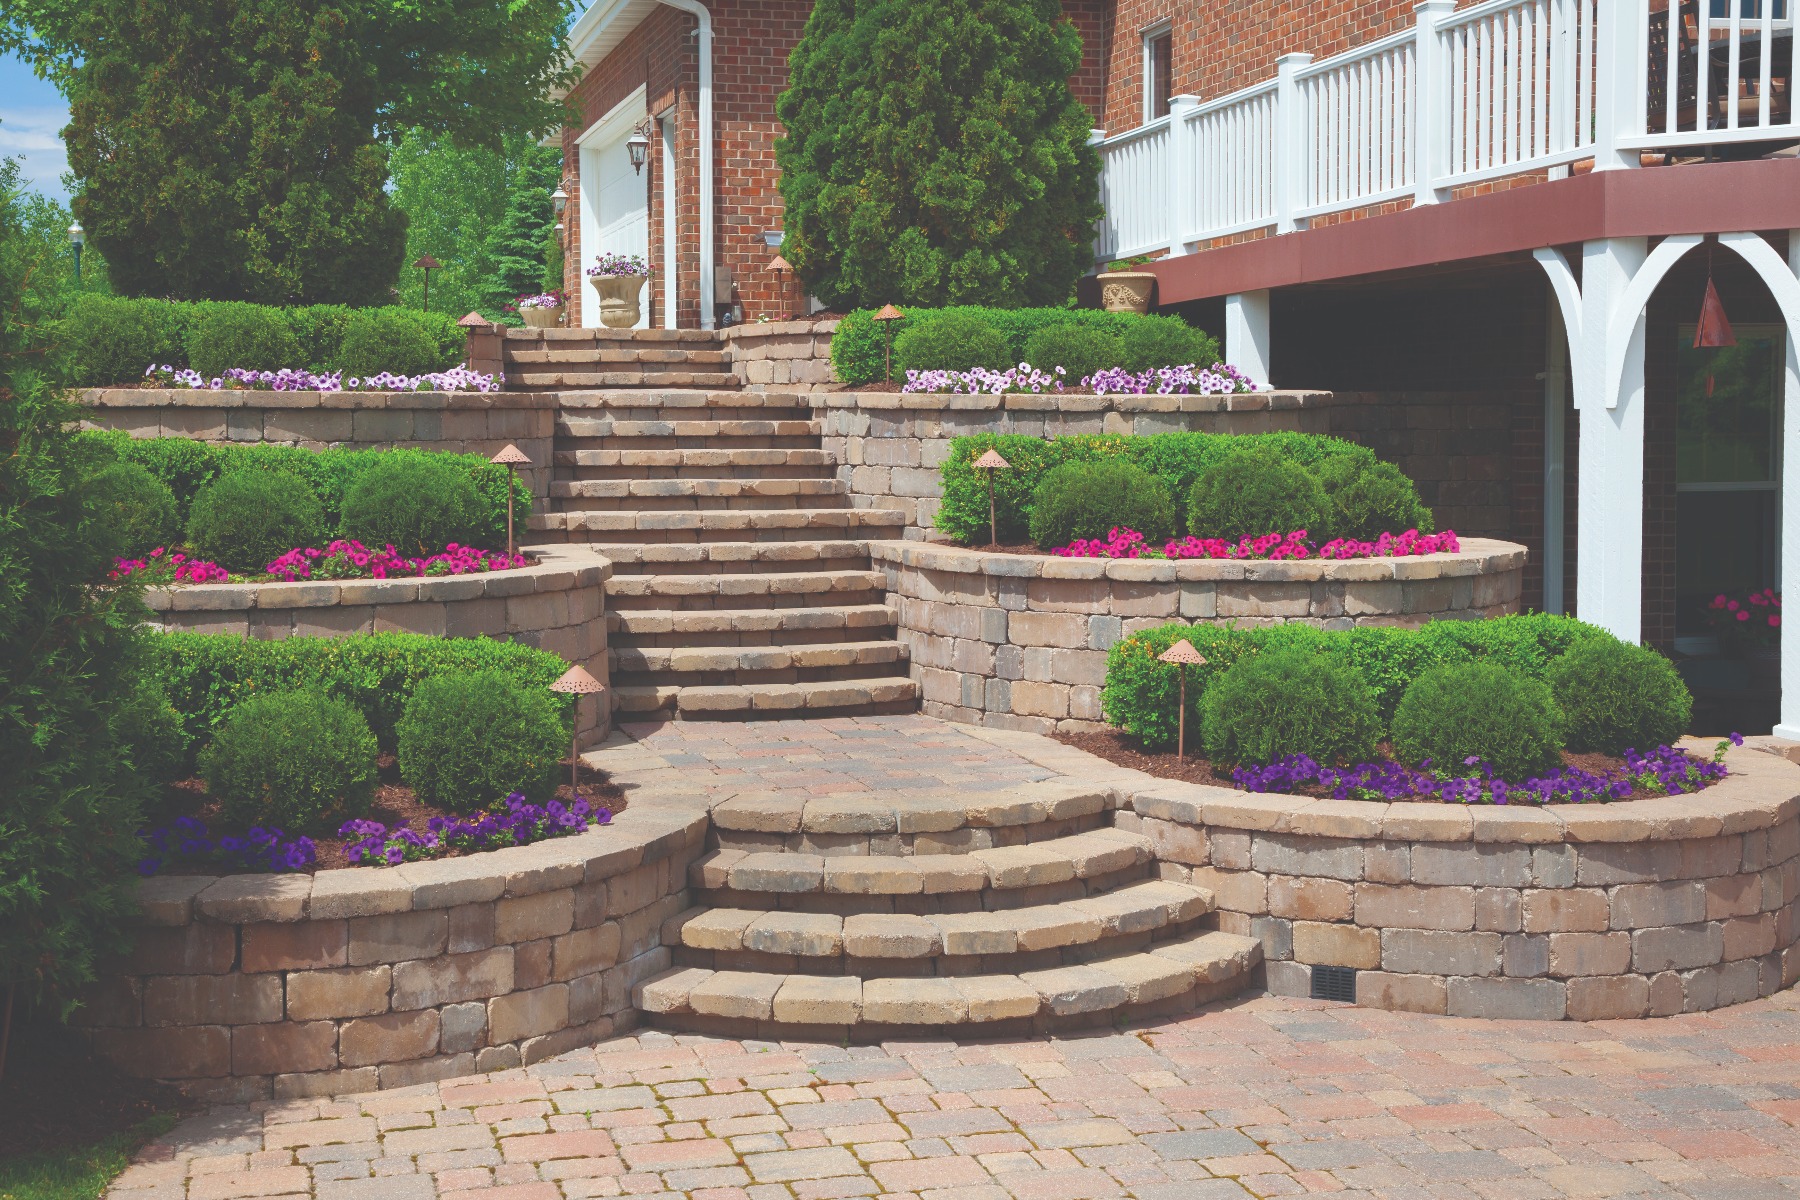
Step 9 - Creating an Outdoor Room
The addition of vertical elements such as retaining or freestanding walls, columns, grill islands, countertops/bars, and fireplaces will truly make your patio into an outdoor extension of your home.
- These elements create the feel of outdoor rooms.
- Walls not only separate spaces and allow elevation changes, they provide additional seating.
- Columns are like doorways in that they mark entry and exit points, and provide vertical interest to horizontal walls.
- Grill islands & bars provide additional prep and eating space, but also serve as a place for friends and family to gather around.
- Fireplaces add warmth literally and figuratively and allow you to use your space despite cooler temperatures.